← ALL ARTICLES

Pre-Drywall Inspection: What Buyers and Builders Should Check

Pre-Drywall Inspection: What Buyers and Builders Should Check

Yes, get a pre-drywall inspection. It’s the one point in construction when framing, plumbing, electrical, and HVAC systems are fully visible and still cheap to fix. Skip it, and problems that would have cost a $50 repair now mean cutting into finished drywall.

Three reasons this inspection earns its place on your schedule:

  • Standards exist for a reason. Both InterNACHI and ASHI maintain formal practice standards specifically for this phase, which tells you the industry treats it as distinct from a general home inspection.
  • This is your only window behind the walls. Once drywall goes up, you’re trusting that everything back there was done right, and verifying it later means demolition.
  • Small errors compound. A misrouted duct or a missing nail plate costs almost nothing to fix now and real money once walls are closed.

If you’re buying new construction, working with a custom builder, or financing through a hard-money lender who expects draw-stage documentation, this inspection isn’t optional. It’s the cheapest insurance policy in the entire build.

Key Takeaways

A pre-drywall inspection is the cheapest, most effective way to catch rough-in defects while framing, plumbing, electrical, and HVAC are still fully visible and inexpensive to fix.

Point Details
Schedule it before insulation Book the inspection once rough-ins are complete, and confirm insulation crews won’t cover components first.
Prioritize HVAC and plumbing Duct routing, sealing, and drain pitch cause the costliest long-term problems if missed at this stage.
Request a standards-based report Ask inspectors to work under InterNACHI or ASHI standards and provide a photo-labeled, room-by-room report.
Attend and document in person Bring your finish schedule, take your own photos, and note trade commitments with dates.
Track fixes to completion Log every finding and its repair status in one system rather than relying on verbal confirmation.

Table of Contents

What Is a Pre-Drywall Inspection and When Does It Happen?

A pre-drywall inspection, sometimes called a rough-in inspection, happens after framing, roofing, windows, doors, and the mechanical rough-ins (plumbing, electrical, HVAC) are installed but before insulation and drywall go in. The build sequence typically runs like this: foundation, then framing and rough-in work, then the pre-drywall inspection, then insulation and drywall, then the final inspection.

InterNACHI defines it as a non-invasive visual examination of readily accessible systems, performed specifically at this window before walls close. It’s a distinct milestone from the final walkthrough, which happens after finishes are complete and focuses on workmanship rather than what’s hidden inside the walls, according to Homes.

What it won’t do:

  • It doesn’t certify code compliance. Local building inspectors handle that separately.
  • It won’t verify the sizing of structural members, per North Carolina’s inspector guidance, which excludes structural calculations from typical pre-drywall scope.
  • It’s not a prediction. The inspector reports what’s visible on that specific day, not what will happen to those systems over the next twenty years.

What Do Inspectors Check During a Pre-Drywall Inspection?

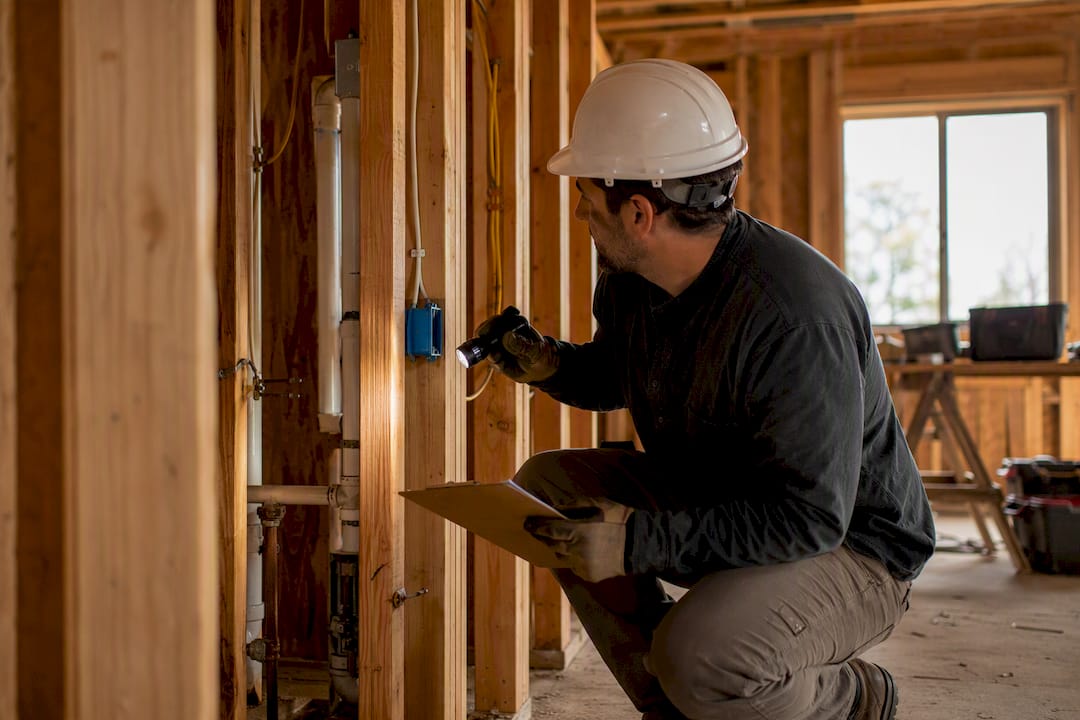
Think of this as a room-by-room sweep paired with a systems check. Walk the house with your inspector (or your own pre-drywall checklist if you’re a builder self-inspecting) and hit these areas:

  • Framing and structure: studs, headers, joists, and any visible cuts or notches that weaken load-bearing members.
  • Foundation: visible cracks, moisture staining, or anchor bolt spacing where accessible.
  • Roofing: decking, flashing at valleys and penetrations, and underlayment where exposed.
  • Plumbing rough-in: drain pitch, vent stack routing, trap locations, and secure pipe strapping.
  • Electrical rough-in: wire routing, junction boxes, outlet and switch box placement, and nail plates protecting wires from drywall screws.
  • HVAC and ductwork: duct routing, register locations, sealed connections, and zoning layout.
  • Windows and doors: flashing integration with the wall assembly and proper tie-in to the weather barrier.
  • Insulation and ventilation prep: clearances and baffles that need to stay visible before insulation goes in.
  • Exterior sheathing: fastening pattern and how it ties into the structural frame.

Some of these issues turn expensive fast once drywall covers them. Homes.com points to missing nail plates, loose or unsecured pipes, misaligned framing, poorly sealed duct joints, and flex ducts that are twisted or cinched too tight as the repeat offenders. None of those are hard to fix now. All of them are a demolition job later.

Document everything as you go. Photograph anything questionable, note the exact room and wall it’s on, and write down what the installer says when you ask about it.

Pro Tip: Tag your photos by room as you shoot them (“Bedroom 2, north wall”) instead of relying on memory later. When you’re comparing 40 photos against a floor plan two weeks after the walkthrough, labels save you from guessing.

A rough-in checklist that standardizes wiring gauge, box placement, pipe pitch, and duct sealing gives everyone on the project the same reference point, which cuts down on disputes about what was actually agreed to.

Which Systems Matter Most During the Inspection?

Not every item on the checklist carries equal weight. If you only have an hour on site, spend it on the systems that are hardest and most expensive to fix after the fact.

HVAC tops that list. Dan Kelly, quoted by Homes.com, calls the pre-drywall phase the only real window to see and adjust what’s behind the walls, since access disappears the moment drywall goes up. Chris Hunter goes further, arguing HVAC deserves the closest look of any system because duct routing, zoning, and equipment placement drive comfort and energy costs for the life of the house.

“Once drywall is hung, that access is essentially lost, and problems become far costlier to fix.” That’s the case for treating this inspection as non-negotiable, not optional.

Priority order for a time-limited walkthrough:

  • HVAC: duct sealing quality, register placement relative to furniture layout, and zoning dampers.
  • Plumbing: drain pitch, water line routing, and the washer drain pan location.
  • Electrical: box placement height and nail plate coverage over every run.
  • Framing: any structural anomaly that looks improvised rather than planned.

HVAC and plumbing issues hit your utility bills and comfort for decades. Electrical gaps create safety risk. Framing anomalies threaten the structure itself. Rank your attention accordingly.

How Should Buyers and Builders Prepare for the Walkthrough?

Preparation looks different depending on which side of the contract you’re on, but both sides benefit from showing up organized.

If you’re the buyer:

  1. Ask the builder for the site plan and any change orders in writing before you arrive.
  2. Bring your contract’s finish schedule so you can confirm outlet, switch, and fixture locations match what you agreed to.
  3. Take your own photos in addition to the inspector’s, and note the date and room for each.

If you’re the builder or GC:

  • Stage the site so framing, rough-ins, and access panels are visible and unobstructed.
  • Invite the plumbing, electrical, and HVAC trade leads to be reachable by phone, if not on site.
  • Keep a punch list template ready so findings get logged in real time instead of from memory afterward.

Confirm insulation timing before the walkthrough. InterNACHI’s guidance warns that insulation installed too early can hide wiring, plumbing, and structural connections the inspector needs to see. If insulation crews are scheduled close to the inspection date, push one of them back rather than risk covering something up.

Expect to block off two to four hours depending on house size, and confirm ahead of time whether photos and video are welcome (they should be).

How Long Does It Take and What Does It Cost?

A typical pre-drywall inspection takes a few hours for a standard single-family home, and more time for larger custom builds or homes with complex mechanical layouts. Multi-story houses with more extensive duct and plumbing systems naturally require longer walkthroughs than single-story homes.

Diagram of pre-drywall inspection time and cost variables

Cost varies by market and by whether the inspection is bundled into your builder’s process or hired independently. Rather than anchor to a number that may not hold in your area, ask any inspector you’re considering for a sample fee schedule or contract up front, and compare that against what your builder already includes in the contract price. Some builders fold pre-drywall checks into their own quality control process at no extra charge; others expect the buyer to hire independently.

Scheduling tip: book the inspection as soon as rough-ins are substantially complete, and try to get it aligned with a day when trade partners are still on site. If the inspector flags a duct connection or a misrouted line, having the HVAC crew reachable that same day means the fix happens before anyone packs up.

How Do You Choose a Qualified Pre-Drywall Inspector?

Ask for a sample report before you hire anyone. A real pre-drywall report is photo-heavy, organized by room or system, and specific about what was found rather than a vague pass/fail. If a candidate can’t produce one, keep looking.

Beyond that, ask directly:

  • Are you certified or licensed, and under which standard?
  • Do you carry errors and omissions or general liability insurance?
  • How many new-construction pre-drywall inspections have you done in the last year?
  • Can you provide references from a builder or a recent buyer?

On standards specifically, look for inspectors who work under InterNACHI’s Pre-Drywall Inspection Standards of Practice or ASHI’s auxiliary pre-drywall standard. Both define scope, timing, and reporting requirements, which means you’re getting a structured report instead of a checklist someone improvised that morning.

Pro Tip: A standards-based report will explicitly list its own limitations and exclusions. If a report reads as unconditionally clean with no caveats at all, that’s a red flag, not a compliment.

What Does a Pre-Drywall Report Include, and What Happens Next?

A solid report follows a predictable structure: a summary page, room-by-room findings, labeled photos tied to each issue, a rough priority ranking (safety and structural issues first, cosmetic notes last), recommended corrective action, and a section spelling out what the inspection did not cover.

When the report flags problems, work through them in order:

  1. Document each finding with the report’s photos and your own notes from the walkthrough.
  2. Notify the builder or general contractor in writing, referencing the specific item and location.
  3. Schedule the correction with the responsible trade, ideally within days while framing is still open.
  4. Request reinspection or photo verification once the fix is complete, don’t just take a verbal confirmation.
  5. Track every repair and its verification status in one system rather than a scattered email thread. A tool like Flip can log photos and remediation status against each line item so nothing falls through before drywall closes it in for good.

Escalate immediately, beyond the normal punch-list process, for anything involving structural framing, safety hazards like exposed wiring, or a trade that ignores repeated requests to fix the same item.

What Happens If You Skip a Pre-Drywall Inspection?

The most common consequence isn’t dramatic. It’s a slow accumulation of small defects that go unnoticed until they cause a bigger problem, like a duct that whistles at high fan speed or an outlet that ends up two feet from where the furniture plan needs it.

Exposed ductwork and plumbing in framed house

The costlier consequences show up later. A drain line pitched incorrectly might not back up for months, and by then the fix means opening a finished wall or ceiling instead of repositioning a pipe that was fully exposed. A missing nail plate over a wire run is invisible until someone hangs a picture and drives a screw into a live circuit. Flex ducts that were twisted or crushed during installation quietly cut airflow to a room for the life of the house, showing up as a comfort complaint the homeowner can’t quite diagnose.

There’s also a financial exposure angle that’s easy to overlook. If you’re buying with a hard-money loan or working through draw-based construction financing, an undocumented rough-in phase gives you nothing to point to if a dispute comes up later about what was actually built versus what was specified. A written pre-drywall report, with photos and dates, is the record that protects you if a disagreement over workmanship surfaces after closing.

None of this requires a disaster to matter. It just requires nobody looking closely at the one moment when looking closely was still cheap.

Do Pre-Drywall Requirements Change by Region or Code?

Pre-drywall inspection isn’t a uniform, code-mandated step everywhere. It functions more as an industry best practice, formalized through standards like InterNACHI’s and ASHI’s, than a box every jurisdiction requires you to check.

Local building departments do run their own rough-in inspections as part of the code approval process, and those are mandatory. But a municipal rough-in inspection checks code compliance, not the broader, more detailed visual sweep a private pre-drywall inspector performs. The two overlap in timing but serve different purposes: one clears the project to move forward legally, the other protects the buyer’s or builder’s own interests beyond what code requires.

What each private, standards-based report includes can also vary by which standard the inspector follows and by state-specific guidance. North Carolina’s inspector guidance, for example, spells out that structural member sizing and full code compliance sit outside typical pre-drywall scope, a limitation that isn’t universally spelled out the same way in every state’s guidance.

The practical takeaway: don’t assume your municipality’s rough-in code inspection covers what a private pre-drywall inspection covers. Ask your builder which inspections are mandatory locally, then decide separately whether to add a private, standards-based inspection on top of that baseline. In most markets, that private inspection is an added layer you choose, not one anyone requires you to schedule.

Should Buyers Attend the Pre-Drywall Inspection in Person?

Show up. Watching an inspector move through the house teaches you more about how your home is actually built than any set of blueprints ever will, and it gives you a chance to ask questions in real time instead of interpreting a report cold three days later.

A few ways to make the most of being there:

  • Walk with the inspector, not behind them. Stay close enough to see what they’re looking at and ask “why” when they flag something, rather than reviewing a summary afterward.
  • Bring your own copy of the finish schedule. Outlet heights, switch locations, and fixture placements are far easier to confirm with the plan in hand than from memory.
  • Ask about anything that looks unfamiliar. Nobody expects you to know what a proper duct seal looks like. A good inspector will explain it on the spot.
  • Take your own photos alongside the inspector’s. Redundancy here is a feature, not a waste of time. If your phone photo has better lighting or a wider angle, use it.
  • Note verbal commitments from trades on site. If an electrician tells you they’ll add a missing nail plate that afternoon, write down the date and who said it.

If you genuinely can’t attend, ask whether a video walkthrough is possible, and insist on a written report regardless. But if your schedule allows even a couple of hours, being physically present during this one inspection is worth rearranging your day for. It’s the only phase of construction where you can point at a wire and ask a question before it disappears behind drywall for good.

What Was Nick’s Take on This?

The advice most buyers get about pre-drywall inspections treats it as a box to check, hire someone, get a report, move on. That undersells what’s actually happening. This is the single point in a build where the buyer, the builder, and the trades all have the same incentive: catch problems while they’re a five-minute fix instead of a wall demolition.

Where conventional advice falls short is in treating every system as equally important. It isn’t. HVAC routing and duct sealing quietly determine how comfortable and how expensive a house is to run for the next twenty years, yet most buyers spend their limited attention on outlet counts and paint colors instead. If you only have an hour with the inspector, spend it on ductwork and drain pitch, not on things you can visually confirm from a floor plan.

The other overlooked piece is documentation. A verbal “yeah, we’ll fix that” from a trade means nothing without a photo, a date, and a written follow-up. Builders juggling five jobs at once aren’t being dishonest when something falls through, they’re just human. Track it like you’d track any other project deliverable, because that’s exactly what it is.

Ready to Track What the Inspection Finds?

A pre-drywall report is only useful if the fixes it calls for actually happen and get verified. Once you’ve got a list of findings, the next challenge is making sure nothing sits untouched while framing, insulation, and drywall move forward on schedule.

Flip was built by someone who lost money on flips from exactly this kind of gap, defects found on site that never made it into a tracked repair. The platform lets you log each inspection finding with photos, assign it to the responsible trade, and get a text update when it’s marked fixed, so nothing rides on someone’s memory. If you’re managing repair costs against a renovation budget, the rehab scope checklist helps turn a raw inspection report into a scoped, budgeted task list you can hand to your contractors. Flip offers a 30-day free trial, and subcontractors use the platform at no cost.

Where Can You Learn More About Pre-Drywall Standards?

Save one of these checklists before your inspection, and ask your inspector for a sample report so you know exactly what you’re getting.

Frequently Asked Questions

Is a pre-drywall inspection the same as a rough-in inspection? They’re closely related and often used interchangeably, but a municipal rough-in inspection checks code compliance for the local building department, while a private pre-drywall inspection is typically a broader, more detailed visual check performed for the buyer’s or builder’s own protection.

Who pays for a pre-drywall inspection? It depends on the arrangement. Some builders include it as part of their own quality control at no added cost, while independent inspections hired by the buyer are billed separately, similar to a standard home inspection.

Can I do a pre-drywall inspection myself instead of hiring a professional? You can walk the site with a pre-drywall checklist and catch obvious issues, but a certified inspector trained under InterNACHI or ASHI standards will spot problems, like improper duct sealing or drain pitch, that aren’t obvious to an untrained eye.

What happens if the inspector finds a defect after insulation is already installed? It depends on the defect. Minor issues sometimes still get fixed with insulation pulled back temporarily, but this is exactly why coordinating insulation timing with your inspector beforehand matters so much.

Does a pre-drywall inspection replace the final walkthrough? No. The final walkthrough happens after drywall and finishes are complete and focuses on workmanship and cosmetic issues, while the pre-drywall inspection is your only look at what’s inside the walls before they close.

Sources

Written with BabyLoveGrowth to write for search

FLIP runs the whole job — scope, subs, schedule and money on one record.

Early access

Get early access to FLIP

We’re opening the first 200 accounts at founding pricing — yours for life. Leave your email and we’ll let you in as spots open. Every plan starts with 30 days free, no card.

No card · contractors always free